Tag Archive for: advice

Top5 Freelancer Tips

Freelancer DeskI never really thought of myself as a freelancer, even though I’ve been working on various projects for a variety of clients for the past five years. But after sharing a week’s worth of freelance articles on Facebook and Twitter I finally realised that’s what I’ve been doing all these years!

Anyway, I thought I would share some of my own suggestions on getting started as a freelancer.

Top 5 Tips to Getting Started as a Freelancer

  1. It’s okay to dip your toes in the water first. I started off slow, working projects in my free time while still going to my “day job”. When I left that full-time position, I took another part-time job, and gradually increased the amount of freelance work I was doing. Eventually, I phased out the part-time work and was only doing freelance work full-time. That whole transition took about two years.
  2. Take your time to set up things correctly. I took several months to create a website, choose a logo, design business cards and come up with a concept for the kinds of services I wanted to offer to clients. All of these things were important to me because they represented myself and the quality of work I had to offer. First impressions are especially important as a freelancer, because a lot of your marketing will come down to networking and the connections that you make.
  3. But don’t take too long! After months of agonizing over what name to choose for my business, my mentor threw up her hands in exasperation and said, “If you can’t decide on a business name after all this time, just use your own name. You can always change it!” Her bold words jolted me into action and “Jenuine Marketing” popped into my head on the drive home. Sometimes you just need to move on with things! Otherwise you’ll never get started.
  4. Find a mentor. Or three. Or even more, if you need it. Chances are when you start off on your own, you will be confused, distracted, and overwhelmed. A mentor can help you focus, get clear on what needs to get done, and encourage you to set goals that will motivate you to succeed on your own. At a recent Women of Whistler event, the moderator Jill Earthy shared a great list of mentor resources:

5. Find a way to keep yourself accountable. If you’re working from home (as many freelancers do), it can be easy to get distracted and spend your entire day doing non-work tasks. I used to put things like tidying the house, laundry, and walking the dog on the top of my schedule, but I found that I was doing less and less “work” each day. Then I signed up for Freshbooks to simplify my invoicing procedures and a newfound source of motivation was discovered! (I’m not paid to say this; I just really like the product). Being able to instantly see how much time I’ve spent on actual billable tasks each day/week/month has been hugely motivating for me. I’m much more productive during my designated work times, more relaxed during my “off” days, and have a burning drive to find new projects and clients.

So there you have it. My top 5 tips for getting started as a freelancer?

Have any extra bits of advice? Feel free to share in the comment section 🙂

Quick overview of Facebook Multi-Product Ads

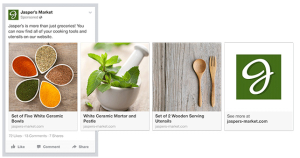
Quick overview of Facebook Multi-Product AdsLately, you may have noticed multi-product ads on Facebook. They feature multiple images, each with its own linkable URL. Apparently they are seeing higher than normal results for less than normal cost. And they look pretty good too!


If you’re a small business owner, you should really pay attention. Facebook multi-product ads seems especially well-suited to retail shops (you could feature images of your most recent / best-selling items), restaurants, coffee shops, and service providers like salons, and photographers. Remember, each image links to its own page, so it is a chance to showcase different sections of your website. And you only pay for one ad,  even though there’s multiple images and links.Facebook Multi Product Ad

This is one of the newest and biggest things on Facebook at the moment, and I recommend jumping on board before everyone else does.

It took me a while to figure out how to make these, but I finally found a very simple, step-by-step set of instructions on the Facebook page. You can view the info here: https://www.facebook.com/help/382681505244772

Note that in order to take advantage of this new type of ad, you need to be using Facebook’s Power Editor. And you can only use Power Editor through the Google Chrome website browser. But it is amazing. Check it out!

Need some help? Please send me a message or leave a comment. Happy Facebooking!

When I first started on Twitter back in 2008, I viewed all Tweets within the Twitter interface. Then, I got hooked on HootSuite, especially when I started managing multiple Twitter accounts. I’m still a paying subscriber to HootSuite and love using the cute little Hootlet add-on to easily share interesting URL’s on Twitter. But something just seemed to be missing.

Enter TweetDeck. This slick desktop application (I prefer the downloaded version, although you can access it online as well) is always running in the background and has become my favourite way to interact with users on Twitter.

Here’s 5 reasons why I like TweetDeck so much:

1. Visually attractive – let’s face it, looks matter. And TweetDeck just plain looks good. I love the black background, the well-sized Twitter profile pics, and the fact that you can always view thumbnail images of pics that people post on Twitter.

2. It still displays Instagram images – as you may have heard, Twitter and Instagram went through a big breakup at the end of 2012. Basically, the end result was that Instagram pictures no longer display within the Twitter interface; instead, you need to click on a link and be taken to another page to view the image. Not so with TweetDeck! You can still view thumbnail images of kids, half-eaten restaurant dishes and scenery shots and also view the full-sized images within TweetDeck.

Update November 2014: Instagram images are no longer displayed in TweetDeck; instead, you need to click on the link and view the image in your browser.

3. Easily view different streams – using TweetDeck’s columns feature, you can add a new column for whichever Twitter account, list, or search result you want. And then you can quickly flip back and forth between them, making it quick and simple to keep up-to-date on what’s going on in your version of the Twittersphere.

4. It makes noise – you can turn on or off sound alerts for each of your columns, so that you hear a ding every time someone messages you, mentions you, writes a Tweet that matches your search criteria, etc. (If you want to make my computer ding, just mention @jenhames on Twitter!)

5. It’s free – I already pay for lots of social media tools and services, so it’s great to find such a great tool that is free.

Do you use TweetDeck? Love it or hate it?
Then leave a comment and let me know what you think.

Stack of papers

I always tell my clients that the hardest part of posting content on the web is getting over your personal hurdles, no matter what they may be. Things like, “I want my first Tweet to be perfect” or “I want to write the most interesting blog post anyone has ever read”. The problem is, these desires to be great and wonderful and perfect can actually become roadblocks that prevent you from getting anything at all done. For me, lately, the hurdle has been, “I want to wait until I have time to sit down, clear my desk, and get into a writing mode”.

Well, that never happens. Right now, I’m writing this surrounded by unfiled papers, with three different browser windows open with who-knows-how-many-tabs open in each browser, and I realised there is never the perfect time. There is never the perfect post. There is never the most interesting content ever written waiting to spring forth from your brain.

The point is, sometimes you need to seize on the moments you have and make them work for you. Dash off a blog post between meetings. Post an interesting thought on your Facebook page while you’re waiting in line for your morning coffee. Just start writing content. Some of will be good, some of it will be bad, and some of it will even be great.

So what are you waiting for? Go do it!

Facebook left menu - Facebook Interest List

A few months ago, Facebook introduced ‘Interest’ lists. If you know me, you’ll know that I love lists; I have them for everything from steps to achieve clients’ goals, to what to pack for a camping trip, to just plain keeping my entire life in order.

Facebook Interest lists are great for two reasons. First, they allow you to organize the pages that you already like into lists, so that you can quickly and easily browse through those pages’ updates. And second, you can follow lists that other people have created, which probably include pages that you’ve never heard of before.

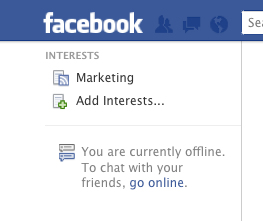
Facebook left menu - Facebook Interest ListYou may have an Interests section on the lefthand menu of your Facebook homepage; if so, click on “Add Interests”.


If not, the easiest way to add the Interests section is to click in the white box at the top of the page that says “Search for people, places and things” and enter the name of a page that you would like to add to an interest list. Once you are on that Facebook page, click on the drop-down arrow beside “”Message” and select “Add to Interest Lists” (see below). Then click “+ New List…”

Later, once you’ve created Interest lists, this is one way that you can add additional pages to the list.


Facebook Interests

A box will pop up; click on “Pages” on the lefthand side. Then start scrolling through the list of pages that you like and click on each page that you want to add to the list – a check mark will appear on each page that you have selected. Click “Next”, then add a name for the list and select who can see the list (public, friends or just you). Click “Done” and you are finished!

Now go to your Facebook homepage (click the Facebook icon on the upper lefthand corner) and on the lefthand menu you will see “Interests” with your newly created list. Click on the list to view updates from only the pages within the list, instead of your entire newsfeed.

To add a new Interest list, click on “Add Interests” on the lefthand menu and then follow one of the suggested lists, search for a list by keyword, or create a new list of your own.

And there you have it – how to organize the Facebook pages you follow using the Interest list.

[divider_line]

Click here to add my “Marketing Pages to Follow” Interest list. And if you have your own Interest list, feel free to post it in the comments section.

TomeIn case you didn’t know, a tome is a very large book, often part of a larger series of books. Exactly what a blog post should not be. And yet every day I see these huge long posts that make my brain want to crawl under a rock and take cover in the fetal position.

The problem is that writing for web is often much more challenging than people think. Because if you actually want people to read what you write (and isn’t that the point?), you need to optimize your content for online viewing. Here are some suggestions to bear in mind:

  1. Use paragraphs. This helps to separate your content into different sections for each unique point or thought, and it also creates lovely white space on the page that is visually appealing to our eyes and brains, increasing the odds that your readers will read the entire post.
  2. Be aware of ‘the fold’. When a person looks at their computer screen, whatever content is visible without needing to scroll down the page is referred to as “above the fold’. It makes sense to put your most engaging points at the top of your post, in order to draw your reader in and give them a reason to scroll down the page to read more.
  3. Use the ‘thesis’ approach. In my university English class, we had to practice writing essays in the following format:
    • Opening paragraph with a sentence about the topic, followed by the three to five points you want to explore.
    • Three to five paragraphs about your topic, with one paragraph per point.
    • Closing paragraph that reiterates the points explored and that summarizes your thoughts on the topic.
  4. Use a list. See, I’m following my own advice already. It doesn’t matter if the list uses bullets or numbers; the point is that a list organizes your points in an efficient way and encourages you to write more succinctly.
  5. Write succinctly. People read online content much differently than books or magazines. Generally speaking, your audience is probably looking to find information quickly. So help them out by writing short sentences, omit unnecessary adjectives, and strive to write good content with less words.
  6. Consider splitting your post into a series. If your post is longer than one and a half pages in a Word document, I would recommend dividing your content into sections, and then posting each section as part of a larger series.

What suggestions do you have for writing online content?